
Before you start
You need Automations permission and a connected Facebook or Instagram account. Finish your message and check its links before turning on the automation.
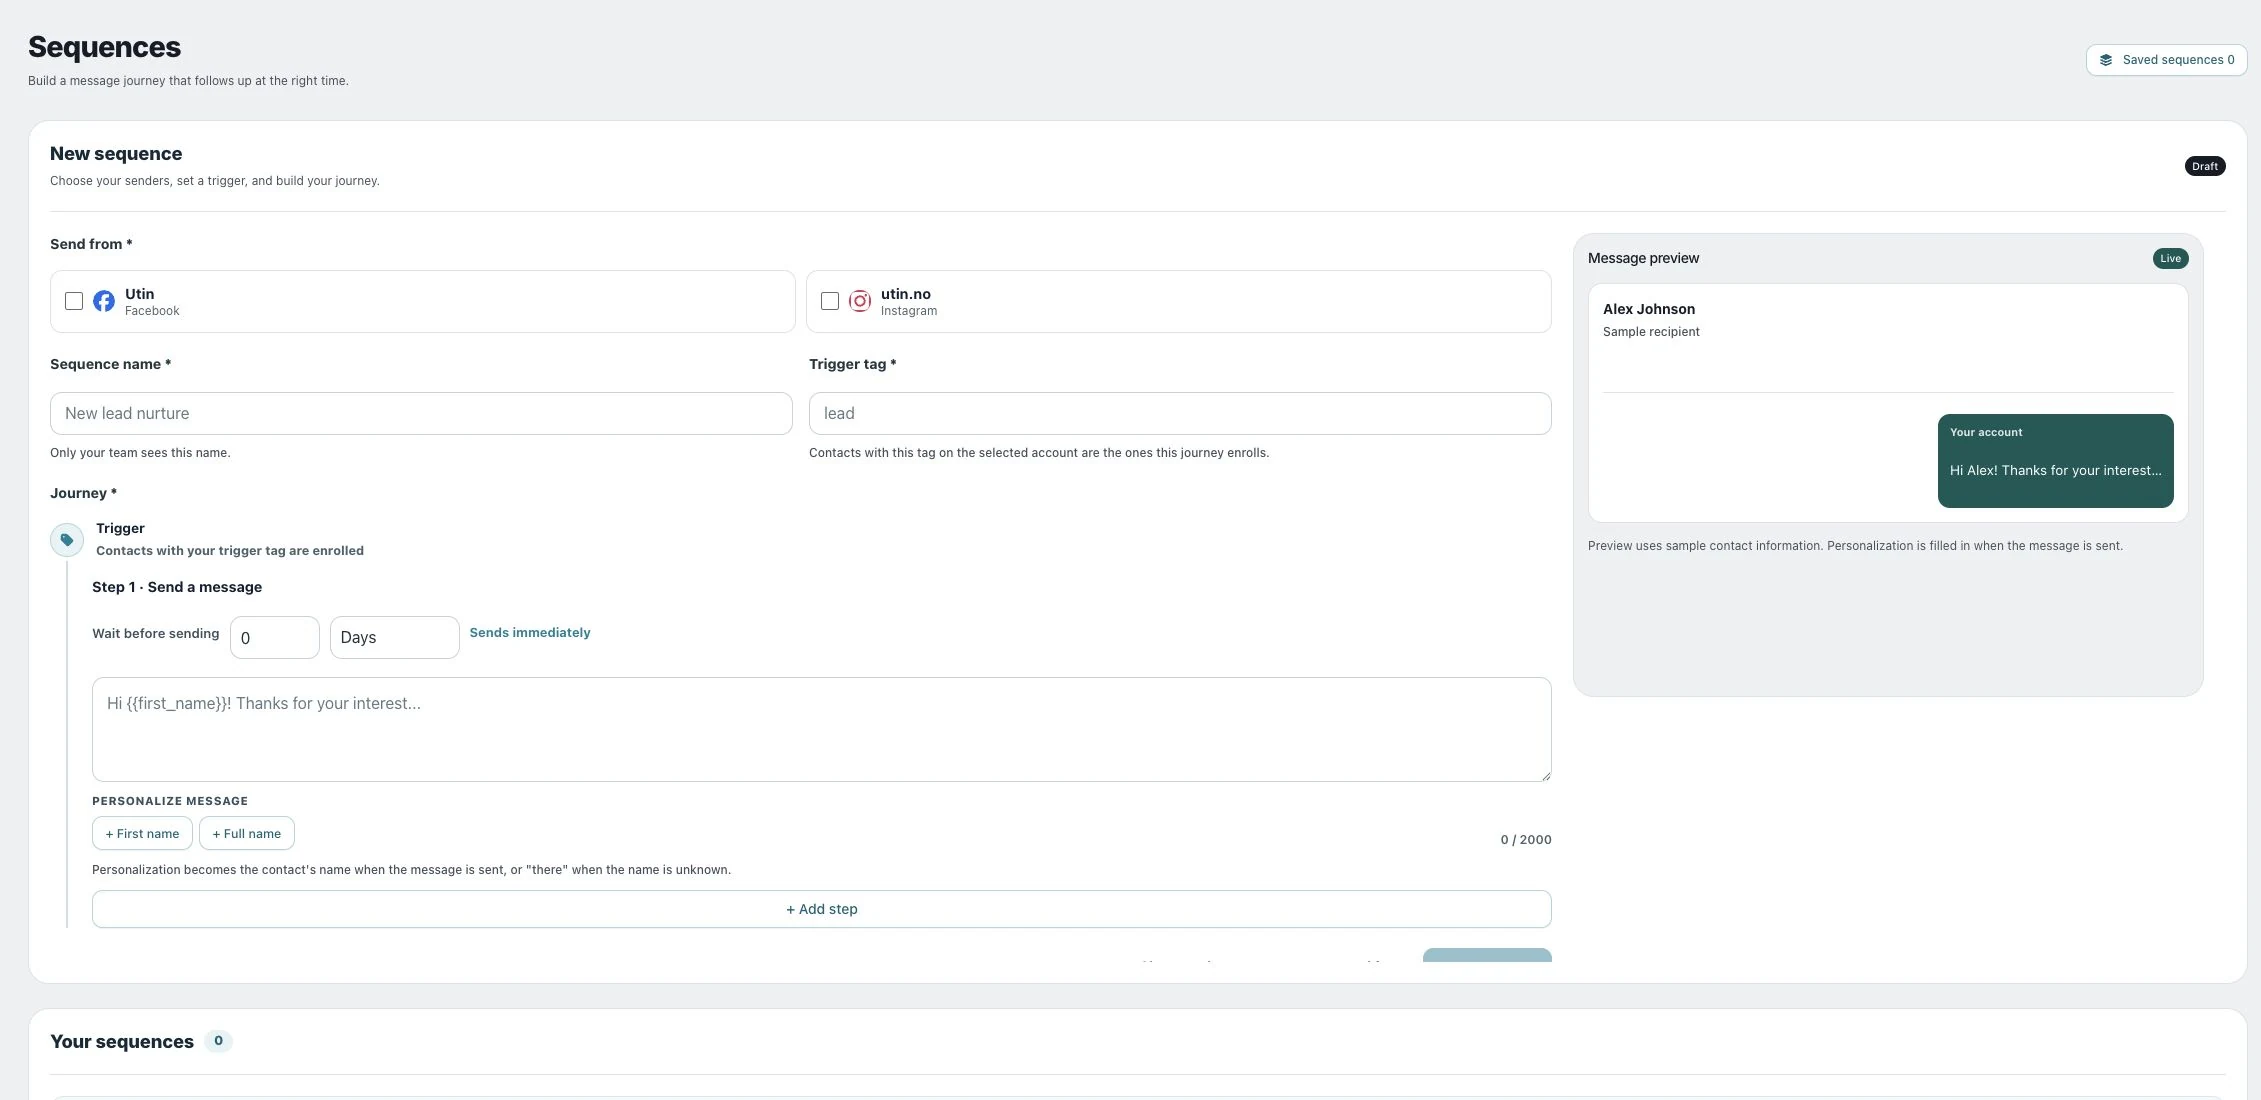
1. Set the sender and trigger
Open Automations → Sequences, choose Send from, enter Sequence name and set Trigger tag. Use the same tag your team applies to the intended contacts in Inbox.
2. Add messages and delays
For each step, set Wait before sending, choose Wait unit and write Step message. Zero means no delay for that step. Use + Add step for another message and read the sequence in order. Add names with the personalization buttons if appropriate.
3. Save paused
Choose Save sequence. It is saved paused. Review the messages and delays in Your sequences before enabling it.
4. Review and activate
Choose Review & activate and inspect the sender, trigger, audience and every step. Activate sequence enrolls currently tagged contacts once; future contacts enroll when the trigger tag is added. Choose Pause if you want to stop the sequence later.
Check the result
Check that the sequence is active and see which contacts have been added. Even when a step’s delay has passed, its message can only be sent when the platform’s messaging rules allow it.
If something does not work
If no contacts are added, check the sender account and make sure the tag matches exactly in the Inbox and sequence. If a contact is waiting for engagement, they may need to send a new message before the sequence can continue. Check the status before changing their tag.