
Before you start
You need Content permission and a connected account to publish from. Have your text, images or video ready, and make sure you have permission to use them.
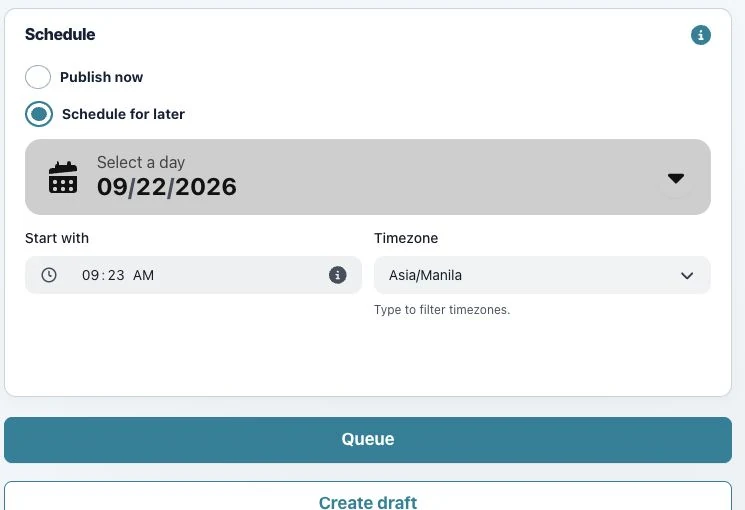
1. Prepare the post
Complete the account selection, content, media and required platform settings in Create post. Check that the selected accounts are the ones you intend to schedule.
2. Set the schedule
Under Schedule, choose Schedule for later. Set Select a day, Start with and Timezone. For a Norwegian publishing time, choose Europe/Oslo rather than assuming your browser’s timezone matches the audience.
3. Queue and verify
Choose Queue, then open Posts → Queue Calendar and find the selected date. Check the accounts and scheduled time. The post is scheduled once; it will not be automatically published again later.
Check the result
The post should appear on its scheduled day. After that time, inspect the publishing outcome rather than assuming it went live because it was queued.
If something does not work
If Queue is disabled, check required fields and use a future time. If the post appears on an unexpected day, compare the selected timezone and displayed time before scheduling a second copy.