
Before you start
You need Automations permission and a connected Facebook or Instagram account. Finish your message and check its links before turning on the automation.
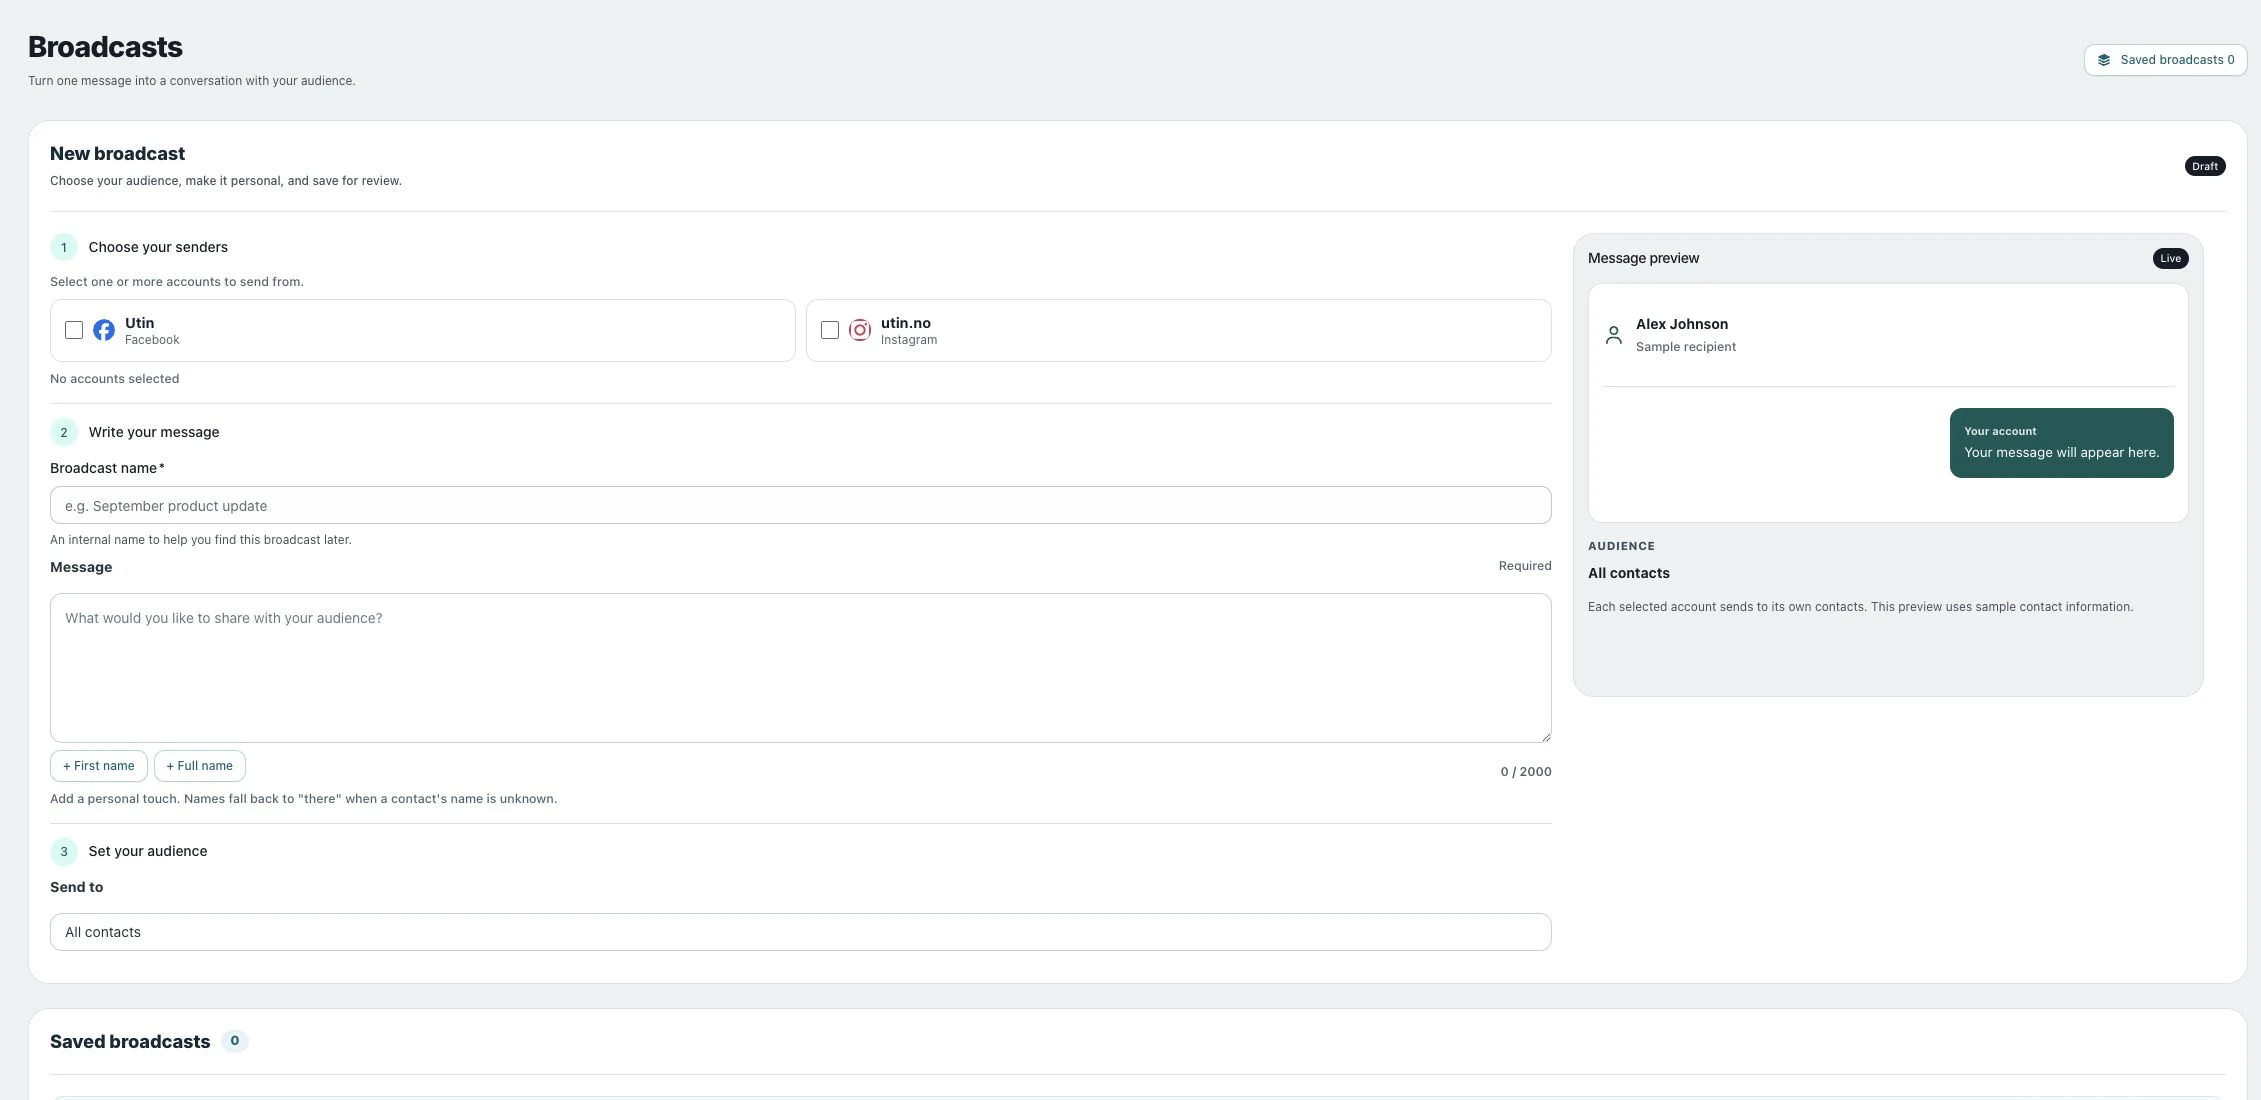
1. Choose the sender and write your message
Open Automations → Broadcast. Select accounts under Choose your senders, enter Broadcast name and write Message. Use + First name or + Full name for supported personalization; unknown names fall back to “there”.
2. Choose the audience
Under Send to, select All contacts or a contact tag. Tags come from the Inbox. Review the estimated audience for each sender; contacts belonging to one account are not automatically contacts of another.
3. Save for review
Choose Save draft. Find it under Saved broadcasts. Use Edit draft and Save draft changes if the message or audience needs adjustment. Saving the draft does not send it.
4. Review and send
Choose Review & send. Check From, Audience, Eligible now, Outside window and the final message. Confirm the send only when these are correct. The eligible audience is fixed when you send, so later tag changes do not affect that broadcast.
Check the result
Read Recipients, Accepted, Delivered, Failed and any Unknown count separately. Accepted means the platform accepted a message; Delivered requires the provider’s delivery receipt.
If something does not work
If Eligible now shows zero, you may not be allowed to message those contacts right now. The platform limits how long you can send messages after a contact’s last activity. If results are Unknown, investigate before choosing Retry unknown, because an uncertain message may already have reached the provider.